A standby or portable generator is a significant investment in reliability, providing a crucial power lifeline when the grid goes dark. However, the lifespan and performance of that essential machine hinge entirely on a few small, often-overlooked components. Chief among them is the air filter. Much like the lungs of any combustion engine, the generator’s air filter is a tireless guardian, protecting precision-engineered components from the harsh realities of the outside world. Yet, it often remains the most neglected part of a generator’s maintenance schedule.
Neglecting this simple, inexpensive component can lead to catastrophic engine failure, costly repairs, and, most critically, a breakdown when you need the power the most. The goal of this comprehensive guide is to move beyond mere replacement instructions and provide a holistic understanding of Cleaning and Maintaining Generator’s Air Filter—covering the why, the when, and the detailed how-to for both common filter types. By the time you finish, you will possess the expertise to transform this chore into a straightforward, performance-boosting routine.
The Silent Sabotage: Why a Clean Air Filter is the Engine’s Best Friend
To truly appreciate the maintenance process, one must first grasp the critical role of air filtration in an internal combustion engine. Your generator’s engine requires a precise mixture of fuel and air to combust. The air it draws in, however, is rarely clean. It is filled with dust, pollen, sand, and microscopic silica particles. These particles, no matter how small, are abrasive.
The Catastrophic Impact of a Dirty Filter
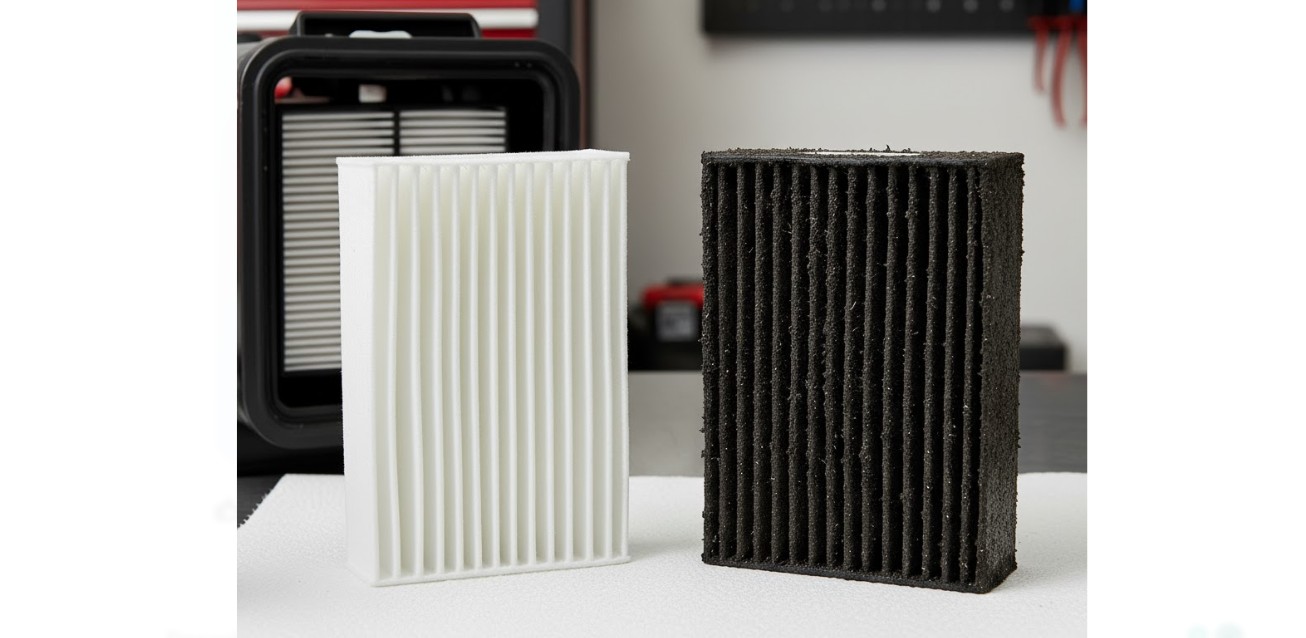
When the air filter becomes clogged, it restricts the flow of air into the carburetor or fuel injection system. This restriction triggers a chain of negative consequences for the engine’s performance, longevity, and even fuel economy.
- Rich Fuel Mixture: A clogged filter limits air intake while the fuel flow remains constant. This creates a “rich” mixture (too much fuel, not enough air). Consequently, the engine struggles to combust the fuel completely, leading to black smoke from the exhaust, rough running, and excessive carbon buildup on the spark plug and inside the combustion chamber.
- Reduced Power and Efficiency: As the engine starves for air, its maximum power output drops significantly. If you have a large generator running near its Generator Output Rating, a dirty filter could mean the difference between keeping the whole house running and tripping breakers. Furthermore, the inefficient rich mixture directly translates to increased fuel consumption.
- Engine Damage: This is the most serious consequence. A severely restricted filter may eventually tear or bypass due to the vacuum pressure created by the struggling engine. If this happens, unfiltered air—full of abrasive debris—rushes into the cylinders. These tiny, hard particles scour the cylinder walls, damage the piston rings, and contaminate the engine oil, leading to premature engine wear and eventual failure.
- Overheating: When an engine runs rich, the incomplete combustion process generates more heat than usual. This added thermal stress contributes to engine overheating, which can quickly ruin the engine’s internal components.
Therefore, inspecting and Cleaning and Maintaining Generator’s Air Filter is not just about keeping the machine running smoothly—it is a fundamental step in preventing costly, internal damage.
Know Your Filter Types: Foam vs. Paper and When To Service
Generators typically use one of two main air filter types, and the maintenance procedure differs significantly for each. Identifying your type is the first step toward proper care.
Type 1: Foam Air Filters (The Reusable Type)
Foam elements are common on smaller portable generators and are typically coated in oil (known as “oiled-foam filters”). The oil provides an additional layer of dust-trapping adhesion, significantly improving filtration efficiency. The great advantage of the foam filter is that it is designed to be cleaned and re-oiled, not simply replaced.
- Maintenance Rule: Foam filters should be inspected and cleaned every 25 to 50 hours of operation or at least once per year. In very dusty or dry environments, this interval must be shortened.
Type 2: Paper Pleated Filters (The Disposable Type)
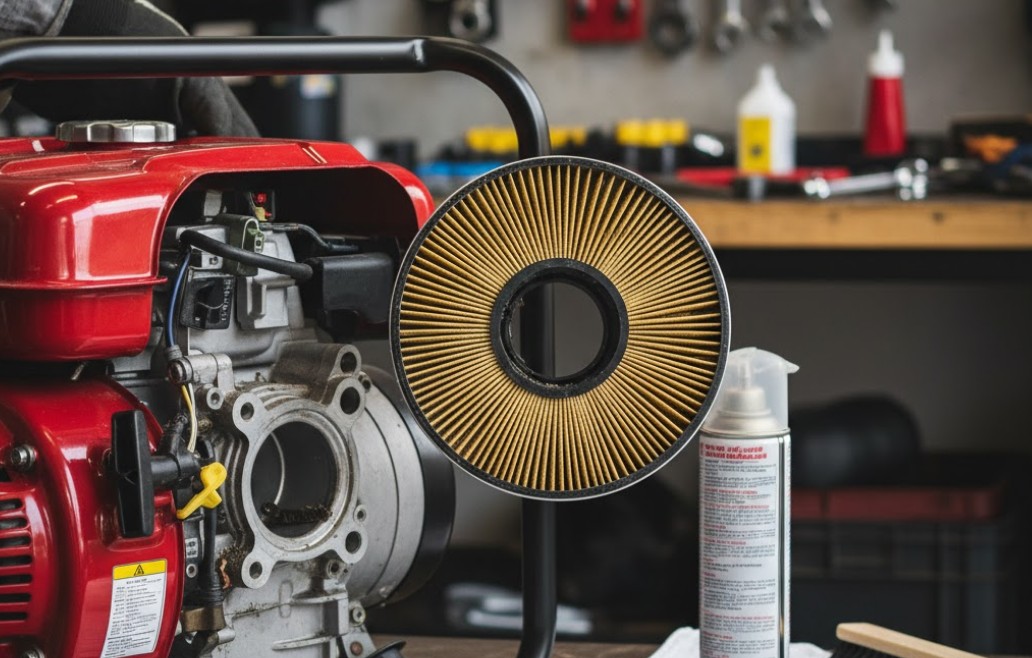
These filters, often found on larger portable and standby units, look like the pleated air filter in a car. They are highly efficient but are not generally designed to be washed. Attempting to wash or use liquids on a paper filter can damage the microscopic filtration media, rendering it useless and allowing dirt to pass through. Some paper filters come with a small foam pre-filter (a dual-element system); the foam element can be cleaned, but the paper element must be replaced.
- Maintenance Rule: Paper filters must be replaced, not cleaned. They should be inspected every 50 hours and replaced every 100 hours of operation or at least once per year. You can lightly tap a paper filter to remove loose surface dust, but only replace it if it’s dirty.
The Annual Inspection Mandate
Regardless of the hours used, every generator, be it a quiet inverter or a heavy-duty standby model, should have its air filter inspected annually. Even sitting idle, a filter can degrade, and the paper or foam material can break down, which is why a thorough check is a standard part of any routine maintenance checklist for generators.

The Step-by-Step Guide to Filter Maintenance: Two Paths to Clean Air
The first and most important rule for any generator maintenance is safety. Always ensure the generator is fully shut down and cool. For an extra layer of protection against accidental start-up, disconnect the spark plug wire and secure it away from the plug. Now, let’s dive into the procedures based on your filter type.
Procedure A: Cleaning and Re-Oiling a Foam Filter
This process requires patience and must be performed without tearing the foam element. Furthermore, do not use gasoline or harsh solvents like acetone, as these will degrade the foam material itself.
Step 1: Access and Remove the Filter
Locate the air filter box, usually a rectangular or square plastic housing near the carburetor. Remove the outer cover—this may involve unsnapping clips or unscrewing a thumb-screw. Carefully remove the foam element from its housing or its plastic cage. Before proceeding, immediately place a clean rag or shop towel over the exposed air intake opening to prevent dirt from falling into the engine. Also, wipe away any loose dirt from inside the filter housing with a damp cloth.
Step 2: The Cleaning Process (Washing and Rinsing)
Fill a bucket with warm water and mild dish soap (or a dedicated foam filter cleaner). Submerge the foam filter and gently squeeze and massage it repeatedly to work the soap through the foam. Do not twist or wring the foam aggressively, as this can cause it to tear. The water will quickly become dark with trapped oil and dirt. Continue rinsing and repeating until the water squeezed from the foam runs clear and the filter element has returned to its original, lighter color.
Step 3: Drying the Filter
This step is crucial: the filter must be completely dry before being re-oiled and reinstalled. Gently squeeze the filter element with a clean, absorbent cloth or paper towel to remove excess water. Then, allow the filter to air dry completely in a clean, warm, and dust-free environment. Do not use compressed air or a heat gun to speed up the process, as excessive heat or pressure can destroy the foam’s cell structure.
Step 4: Re-Oiling for Adhesion
A dry foam filter provides minimal protection; the oil is what traps the fine dust. Use either clean engine oil (the same type recommended for the generator) or a dedicated foam filter oil. Pour a small amount of oil onto the filter and gently massage it in until the entire filter is coated. It should look slightly damp, not dripping wet. Gently squeeze out any excess oil with a clean cloth. The goal is an even, light coating that will catch dust without leaving a pool of oil in the filter housing.
Step 5: Reinstallation
Remove the rag from the intake opening. Carefully place the re-oiled foam element back into its plastic cage or directly into the air filter housing. Ensure it sits flush and properly sealed around the edges. Replace the air filter cover and secure the clips or screws. Your generator now has a clean path to air and renewed protection.
Procedure B: Inspecting and Replacing a Paper Filter
Step 1: Access and Remove the Filter Element
As before, safely shut down and cool the generator. Open the air filter box and carefully remove the paper element. If there is a foam pre-filter, gently remove it and follow Procedure A to clean and re-oil it. If you have only a paper element, proceed to the inspection.
Step 2: Inspection (When To Replace)
Inspect the paper filter by holding it up to a bright light. If you can see light through the pleats, the filter may still be serviceable, but you can try to remove any loose debris. Do this by gently tapping the filter element on a hard surface or by blowing it out with very low-pressure compressed air (less than 30 psi) directed from the clean side (inside) outwards. Warning: Never blast high-pressure air at a paper element, as this will tear the delicate paper fibers, instantly destroying its filtration capabilities. If the filter is dark gray or black, or if you can see any tears, holes, or damage to the pleats or the rubber/plastic sealing gasket, it must be replaced immediately.
Step 3: Replacement and Sealing
Install the new paper filter element into the housing. Ensure the sealing gasket is positioned correctly and that the filter is seated snugly. This sealing is non-negotiable; any gap will allow unfiltered air to bypass the media, making the entire procedure worthless. Reinstall the foam pre-filter (if applicable) and securely fasten the air filter cover.
Advanced Maintenance and Troubleshooting: Keeping the Airflow Perfect
While the steps above cover 99% of air filter maintenance, there are a few advanced considerations and signs that indicate the filter or related systems are having trouble.

Signs You Have a Problem Beyond the Filter
Even with a new air filter, some symptoms may persist, indicating a deeper issue that needs attention. These issues often relate directly to the air-fuel mixture, and an improper ratio can severely impact your engine’s Generator Output Rating:
- Black or Sooty Exhaust: A dirty filter is the main cause, but persistent black smoke with a new filter suggests the carburetor is set too rich or the choke is sticking.
- Engine Surging or “Hunting”: If the engine rpm cycles rapidly up and down under a light load, it indicates the air-fuel mixture is inconsistent. This can be caused by a filter that’s not properly seated (allowing too much air) or a carburetor issue.
- Fouled Spark Plug: A plug coated in black, wet, sooty carbon is a classic sign of an overly rich mixture, which is a direct consequence of an air-starved engine caused by a dirty air filter.
The Role of the Air Filter in Long-Term Reliability
Consistent, clean air is arguably the simplest factor in prolonging the life of your engine. By preventing abrasive contaminants from entering the combustion chamber, you dramatically reduce wear on the piston, rings, and valves. This extends the service life between necessary major maintenance checks. Conversely, ignoring this step makes all other maintenance, like oil changes, less effective, as fine dirt particles are then introduced into the engine oil.
Air Filter Storage and Handling Best Practices
When purchasing replacement filters, it’s wise to buy them in advance, especially for less common models. Store replacement filters in their original, sealed packaging in a dry, climate-controlled area. Excessive humidity or extreme temperature fluctuations can cause paper media to warp or foam elements to prematurely degrade. Always handle the filter by its perimeter or plastic/rubber seal; never touch the filtration media itself, as the oils from your skin can impede the filter’s performance.
Final Thoughts
The core message of Cleaning and Maintaining Generator’s Air Filter is simple: this small, inexpensive component wields a disproportionately massive influence over the performance and longevity of your generator. Neglect it, and you risk a domino effect of internal damage, from restricted power and poor fuel economy to carbon buildup and irreversible cylinder wear.
Incorporating air filter checks into your routine maintenance—every 25 to 50 hours for foam and 100 hours for paper—is a non-negotiable step toward securing your investment. Remember the distinct rules for each type: clean and re-oil foam; lightly dust and replace paper. By adhering to these simple, detailed procedures, you ensure that your generator always has the clean, unimpeded airflow it needs to deliver reliable power, hour after hour, year after year.
Treat your generator’s air filter as its vital respiratory system, and it will faithfully perform its duty when you need it most.
Disclaimer: Always refer to your specific generator model’s owner’s manual for precise air filter type, cleaning procedures, replacement intervals, and safety warnings. Manufacturer instructions always supersede general advice.
Amranul is a highly experienced product review writer with a passion for helping readers make smart, informed purchasing decisions. Since 2018, he has specialized in thoroughly researching and analyzing a wide range of products to deliver honest, in-depth reviews. Amranul combines technical accuracy with clear, engaging writing to break down complex product features and highlight true user value. Look for his reviews to find reliable information and expert insights you can trust before you buy!


