Understanding the Heart of Your Generator: What is a Carburetor?
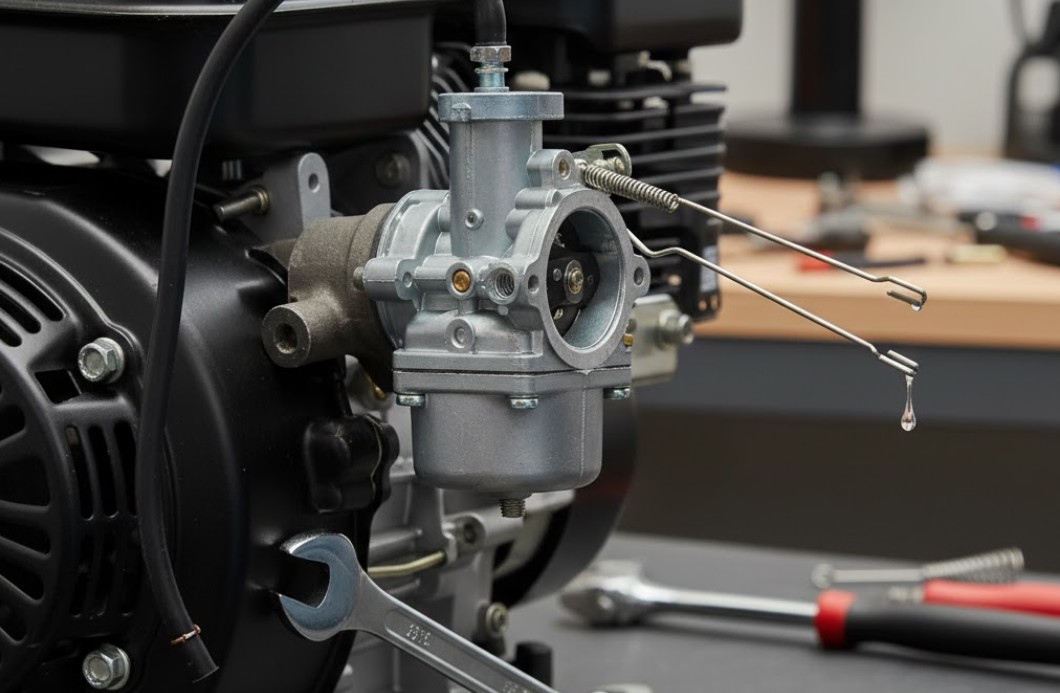
Before we dive into the cleaning process, it helps to understand what the carburetor does. In simple terms, the carburetor is the device that mixes air and fuel in the correct proportions before the mixture is ignited in the engine’s combustion chamber. It’s a precision instrument, designed to deliver a specific fuel-to-air ratio for various operating conditions, from starting up to running under a full load.
You can think of the carburetor as the engine’s lungs and mouth, carefully controlling the intake of air and the delivery of fuel. It ensures smooth operation, optimal power output, and efficient fuel consumption. Its complex design, however, features several very small passages and jets—the very elements that make it susceptible to clogs. For a more detailed technical overview, consider reviewing the Wikipedia entry on the Carburetor.
The Enemy Within: Why Carburetors Get Clogged
The most significant threat to your generator’s carburetor is the fuel itself, particularly modern gasoline containing ethanol.
The Problem with Ethanol-Blended Fuel
Most gasoline sold today contains up to 10% ethanol (E10). While a renewable fuel source, ethanol is also hydroscopic, meaning it readily absorbs moisture from the atmosphere.
- Water Contamination: When ethanol-blended fuel sits in your generator’s fuel tank and carburetor bowl for extended periods—especially during long-term storage—it absorbs enough water that the ethanol eventually separates from the gasoline, sinking to the bottom of the fuel system. This water/ethanol mixture is highly corrosive and can cause rust and damage.
- Varnish and Gum Formation: As the volatile compounds in gasoline evaporate, they leave behind a sticky residue known as “gum” or “varnish.” This residue hardens, forming clogs in the tiny, precision-machined jets and passages within the carburetor. This is a primary cause of poor performance.
Since most generators sit idle for months, only to be run a few times a year, the fuel in the carburetor bowl and fuel lines has ample time to degrade and cause issues.
Recognizing the Symptoms: When is it Time for a Carburetor Cleaning?
Knowing the tell-tale signs of a dirty carburetor can save you a lot of headache during an actual emergency. If your generator exhibits any of the following symptoms, it’s likely time to schedule a cleaning:
Difficulty Starting or Failing to Start
A clogged pilot jet (which controls fuel flow at low speeds and for starting) prevents the engine from getting the rich mixture it needs to fire up. The engine may crank endlessly but never catch.
Engine Surging or Hunting
The generator starts but rapidly cycles between high and low RPMs, a condition often described as “hunting” or “surging.” This is a classic symptom of a partially blocked main jet, which starves the engine of fuel under load or even at idle.
Reduced Power and Stalling
If the generator starts but stalls as soon as a load is applied, or if it runs fine for a few minutes and then dies, the carburetor’s main passages are likely restricted. The engine isn’t receiving the consistent fuel flow required for steady operation.
Black Smoke or Excessive Fuel Consumption
In some cases, a carburetor can clog in a way that creates an excessively rich mixture (too much fuel, not enough air). This results in visible black smoke from the exhaust and a noticeable increase in fuel consumption.
The Preparation: Safety and Tools
Cleaning a generator carburetor is a detailed process that requires focus and the right equipment. Safety first, as you will be working with volatile gasoline and sharp tools.
Safety Precautions
- Work in a Well-Ventilated Area: Carburetor cleaner fumes are toxic.
- Disconnect the Spark Plug: To prevent accidental starting, always remove the spark plug wire from the spark plug and secure it away from the plug.
- Allow the Engine to Cool: Never work on a hot engine—wait for it to cool down completely.
- Fire Safety: Keep a fire extinguisher nearby and ensure there are no ignition sources in the vicinity.
- Protective Gear: Wear safety glasses and chemical-resistant gloves.
Essential Tools and Supplies
- Carburetor Cleaner: A specialized spray solvent designed to dissolve gum, varnish, and carbon deposits.
- Clean Cloths/Rags: For wiping down parts.
- Needle-Nose Pliers: For disconnecting fuel lines and handling small parts.
- Screwdrivers (Flathead and Phillips): For removing housing and carburetor screws.
- Socket/Wrench Set: For removing the air cleaner housing and mounting bolts.
- Compressed Air: Highly recommended for clearing out jets and passages. If you don’t have an air compressor, a can of compressed air works in a pinch.
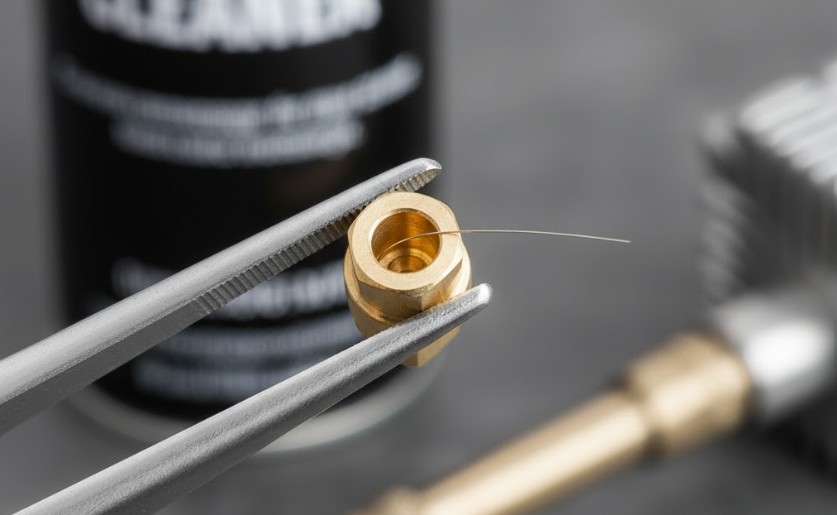
- Thin Wire: A dedicated carburetor cleaning kit often includes tiny wire brushes or strands for clearing jets. A single strand of wire taken from a wire brush can also work. Never use a metal drill bit, which can damage the jets.
- Clean Container: For catching spilled fuel and holding disassembled parts.
Step-by-Step Guide to Cleaning The Carburetor In Your Generator
The process can be broken down into three main phases: removal, cleaning/disassembly, and reassembly/reinstallation.
Phase 1: Carburetor Removal
The exact steps vary slightly by generator model, but the general procedure is universal.
Step 1: Shut Off Fuel and Drain the Tank/Bowl
Locate the fuel shut-off valve (petcock) on your generator and turn it to the “Off” position. Place a suitable container underneath the carburetor bowl. On most generators, the bowl has a small drain screw—unscrew it to drain all the fuel from the carburetor bowl into your container. This prevents spills during removal.
Step 2: Remove the Air Cleaner Assembly
The carburetor is typically located behind the air cleaner housing. Unscrew and remove the housing and the air filter. You will now see the carburetor connected to the engine block.
Step 3: Disconnect Linkages and Fuel Line
Carefully note the position and connection points of any throttle and choke linkages (small rods or wires). Take a photo with your phone for reference during reassembly—this is a crucial step. Use your pliers to gently disconnect the fuel line where it connects to the carburetor’s inlet. Be ready for a small amount of residual fuel to spill.
Step 4: Remove the Carburetor Mounting Bolts
The carburetor is held onto the engine by two or more long bolts (often 10mm or 12mm) that pass through the carburetor and into the engine block. Use a socket or wrench to remove these bolts. Once the bolts are out, gently slide the carburetor off the mounting studs. Be careful not to lose any gaskets between the carburetor and the engine. If the gaskets are torn or damaged, they must be replaced.

Phase 2: Disassembly and Cleaning
Now that you have the carburetor free, the real work begins.
Step 5: Remove the Float Bowl and Float
The bottom of the carburetor is the float bowl, usually held in place by a single bolt. Remove this bolt and carefully take off the bowl. The bowl will likely contain old, varnished fuel. Use a clean cloth and carb cleaner to thoroughly clean the inside of the bowl.
Inside the carburetor body, you will see the float—a plastic or brass component that looks like a small doughnut or lever. The float is held in place by a small metal pin. Gently slide or push the float pin out and lift the float and the attached needle valve out of the carburetor body. Clean the float and check the rubber tip of the needle valve for any visible damage or wear.
Step 6: Remove and Clean the Jets
The jets are the most critical, easily clogged components. There are typically two main jets:
- Main Jet: Often located on a central post, it controls the fuel mixture for high-speed operation. It is usually unscrewed with a flathead screwdriver.
- Pilot/Idle Jet: A smaller jet, often screwed into a separate passage. It controls the fuel mixture for starting and idling.
Carefully unscrew and remove both the main jet and the pilot jet.
Step 7: The Deep Clean
This is where the carburetor cleaner and compressed air come into play.
- Jet Cleaning: Spray a liberal amount of carburetor cleaner directly through the tiny holes of the main and pilot jets. If the holes are clogged, use your thin wire strand to gently *push* through the holes to dislodge the hard varnish. Once you’re sure the passage is clear, blow compressed air through the jet to confirm clear flow. You should be able to see light through the tiny aperture.
- Carburetor Body: Spray cleaner into every passage and hole you can access in the carburetor body, particularly where the jets and fuel inlet were located. You should see the cleaner spraying out of other ports. This confirms that the internal passages are clear.
- Final Blow-Out: Use compressed air to thoroughly blow out all jets, passages, and the carburetor body. This removes any residual liquid cleaner and loose debris.

Phase 3: Reassembly and Reinstallation
Reassembly is simply the reverse of the disassembly process, but take your time.
Step 8: Reassemble the Carburetor
- Install Jets: Carefully screw the pilot and main jets back into their respective spots. Do not overtighten—they are delicate brass parts.
- Install Float and Needle Valve: Ensure the needle valve (the piece that stops the fuel flow when the bowl is full) is seated correctly. Place the float back and gently push the float pin back into place.
- Install the Float Bowl: Re-attach the float bowl, making sure the bowl gasket is properly seated and not pinched or torn. Tighten the bowl nut firmly.
Step 9: Reinstall on the Engine
- Gaskets: Ensure the gaskets between the carburetor and the engine are in good condition and correctly positioned.
- Mounting: Slide the carburetor back onto the mounting studs. Reinstall the mounting bolts and tighten them in a diagonal pattern (if applicable) to ensure even pressure.
- Linkages and Fuel Line: Reconnect the choke and throttle linkages, referring back to your photo or notes. Reattach the fuel line and secure it with its clamp.
Step 10: Test Run
Turn the fuel shut-off valve back to the “On” position and check for any leaks. Let the carburetor bowl refill for a few minutes. Reconnect the spark plug wire and attempt to start the generator. It may take a few pulls or seconds of cranking to prime the clean carburetor. If the generator starts and runs smoothly without surging, the cleaning was successful! If you’re considering a whole home backup solution, a well-maintained portable unit is an excellent supplement or a primary source for essential needs. Learn more about options for larger power needs here: best whole-house generators.
Troubleshooting: The Carburetor is Still Clogged
Occasionally, a stubborn clog won’t clear with a standard spray and wire cleaning. If your generator still won’t run correctly after a thorough cleaning, you have a few options before buying a brand new generator.
Ultrasonic Cleaning
This is the preferred method by professional mechanics. An ultrasonic cleaner uses high-frequency sound waves in a cleaning solution to create microscopic bubbles that implode, dislodging varnish and debris from even the smallest, most inaccessible internal passages. This method typically requires professional service but is the most effective way to save a heavily clogged carburetor.
Carburetor Replacement
Due to the relatively low cost of replacement carburetors for many popular generator models, it’s often more economical for the average homeowner to simply replace the entire carburetor assembly than to pay for professional cleaning. If the cleaning steps failed, purchasing a new carburetor (often under $30-$50 for small engines) is a straightforward fix.
Preventative Maintenance: Keeping Your Carburetor Clean
The best way to deal with a dirty carburetor is to prevent it from getting dirty in the first place. This comes down to two simple practices.
Use a Quality Fuel Stabilizer
Always use a high-quality fuel stabilizer, such as STA-BIL or Sea Foam, in your generator’s fuel tank, especially before any period of storage longer than one month. Stabilizers chemically slow down the degradation of gasoline and reduce the formation of gums and varnishes.
Run the Carburetor Dry
Before storing your generator for the season:
- Turn the fuel shut-off valve to the “Off” position.
- Allow the engine to run until it completely runs out of fuel and stalls. This ensures all the fuel is burned out of the carburetor bowl and jets.
- If you have a fuel drain screw on the carburetor bowl, open it briefly after the engine has stalled to confirm the bowl is completely empty.
Following these simple storage steps will dramatically extend the life of your carburetor and ensure your generator fires up easily when you need it most.
Final Thoughts
The carburetor is indeed the most sensitive component of your gasoline generator’s engine. While a small, complex piece of engineering, it is not beyond the capabilities of a dedicated homeowner to maintain. By recognizing the symptoms of a clog, following the proper safety precautions, and meticulously working through the disassembly, cleaning, and reassembly process, you can restore your generator’s performance.
Regular maintenance, coupled with the crucial step of using fuel stabilizer and running the carburetor dry before storage, will keep your generator in top shape. Ultimately, a clean carburetor means a reliable power source, ensuring peace of mind during the next storm or power outage. Taking the time to master Cleaning The Carburetor In Your Generator is one of the best investments you can make in your home’s backup power system.
Amranul is a highly experienced product review writer with a passion for helping readers make smart, informed purchasing decisions. Since 2018, he has specialized in thoroughly researching and analyzing a wide range of products to deliver honest, in-depth reviews. Amranul combines technical accuracy with clear, engaging writing to break down complex product features and highlight true user value. Look for his reviews to find reliable information and expert insights you can trust before you buy!


