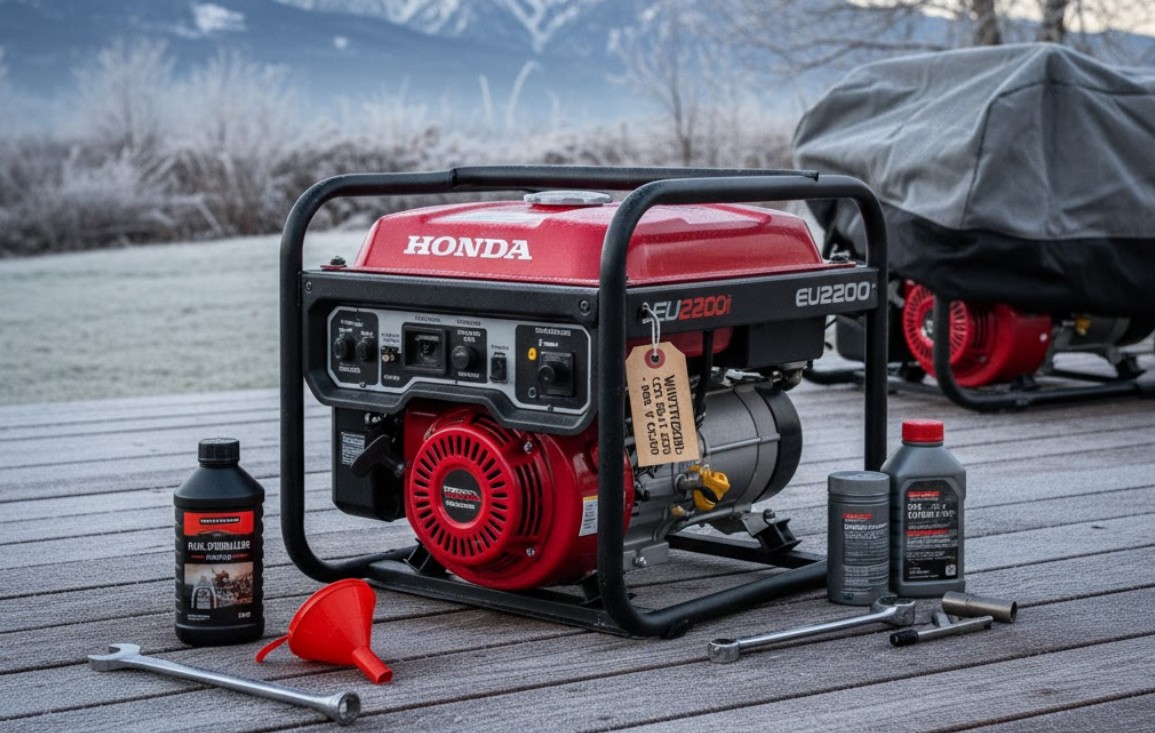
The transition from autumn to winter brings with it the unwelcome threat of severe weather, ice storms, and power outages. For homeowners and businesses that rely on a generator—whether a portable generator for emergency backup or a whole-house standby generator—the changing seasons mean it’s time for a crucial maintenance ritual: winterizing. This process is far more than just covering the unit; it’s a detailed regimen designed to protect expensive engine components from the damaging effects of cold, moisture, and neglect, ensuring your power source fires up reliably when you need it most. Failing to properly winterize your generator can lead to hard starting, decreased efficiency, and potentially costly repairs, rendering your backup power useless during an emergency.

Therefore, before the first significant freeze hits, dedicating time to this preparation is an investment in reliability. We will comprehensively cover the specific steps required for both portable and standby units, focusing on the differences in fuel management, lubrication, electrical components, and placement. From simple fluid checks to advanced protective measures, this guide provides the detailed information you need to successfully winterize your generator and guarantee performance, even in the deepest cold.
Portable Generators: Two Paths – Winter Storage Versus Winter Readiness
When preparing a portable generator for winter, the first consideration is its intended use. Will the generator be stored away for the season, or will it be kept ready for immediate deployment in case of a storm? The required winterizing steps differ significantly based on this decision.
Path 1: Winterizing for Long-Term Storage
If your area rarely sees power outages during the winter and you plan to put your portable unit away until spring, the primary goal is to protect the engine components and fuel system from corrosion and gumming.
The Fuel Dilemma: Stabilization or Drainage?
Gasoline is the Achilles’ heel of any small engine. It begins to degrade quickly, often in as little as 30 to 60 days, forming varnish and gum that can clog the carburetor and fuel lines. You have two highly recommended options for storage:
- Drainage (The Safest Route): The absolute best practice for long-term storage is to remove all fuel. First, run the generator until it is completely out of gas. This ensures the carburetor bowl is empty, preventing ethanol from attracting moisture and corroding internal parts. Always perform this step outdoors and allow the unit to cool fully.
- Stabilization (The Convenience Route): If you prefer to keep fuel in the tank for easier startup later, use a high-quality fuel stabilizer. Add the stabilizer directly to a full tank of fuel, then run the generator for at least 10 minutes to circulate the treated fuel through the entire system, including the carburetor. Note that even stabilized fuel should only be kept for the duration specified by the stabilizer manufacturer, typically 6–12 months. This method is generally better for shorter-term storage (1–3 months).
Diesel, propane, and natural gas units have different considerations. Diesel fuel can “gel” in extreme cold, but this is usually only a concern if the unit is in use. For storage, proper fuel filtration and the use of anti-gelling additives are crucial if the tank isn’t being emptied. Propane and natural gas units do not face degradation issues in the same way, but their lines should be shut off at the source.
Understanding how different fuel sources react to the cold is essential for proper preparation. Explore the complete list of generator fuel types and their cold-weather characteristics.
Lube System and Spark Plug Care
After draining or stabilizing the fuel, attention must turn to the engine itself. Change the engine oil and oil filter before storage. Used oil contains contaminants and acids that can corrode internal engine surfaces over time. Replacing the oil now ensures that clean, fresh lubricant protects the engine all winter. For most portable units, a standard 10W-30 weight is adequate for storage, but we will revisit cold-weather use oil later.
Finally, remove the spark plug and pour a small amount (about a tablespoon) of clean engine oil or fogging oil into the spark plug hole. Gently pull the recoil cord a few times to coat the cylinder walls, then replace the spark plug. This step, known as “fogging,” prevents rust from forming on the cylinder walls during dormancy, a critical component of successful winterizing.
Path 2: Winterizing for Emergency Readiness
If you live in an area prone to winter power outages, your generator needs to be ready to start at a moment’s notice. The focus here shifts from long-term preservation to immediate operational capability in freezing temperatures.
Oil Weight Adjustments for Cold Starts
Oil viscosity is the single biggest factor in cold-weather starting. The standard 10W-30 oil used in warmer months can become too thick in sub-freezing temperatures, making it difficult for the starter to turn the engine over. When winterizing your generator for use, switch to a multi-viscosity oil like 5W-30 or even 0W-30 (synthetic oil is highly recommended here). The ‘W’ stands for winter; these lower viscosity oils remain fluid at lower temperatures, reducing friction and ensuring easier, faster starts. Always consult your generator owner’s manual for the manufacturer’s specific cold-weather oil recommendations.
Essential Cold-Weather Accessories and Battery Prep
Many generators, especially those with electric starts, rely on a battery that suffers greatly in the cold. A fully charged battery loses capacity rapidly as temperatures drop. To counteract this, utilize:
- Battery Blankets or Heaters: These maintain the battery at an optimal temperature, preserving its cranking power.
- Trickle Charger: Keep the battery constantly connected to a small, smart trickle charger to maintain a full charge without overcharging.
- Engine Block Heater: For very large or industrial portable units, an engine block heater may be necessary. This heats the coolant and oil before starting, significantly reducing engine wear and making immediate ignition possible.
Standby Generators: A Focus on Continuous Reliability
Standby generators are permanently installed and typically run weekly self-tests, meaning the winterizing process is integrated into a year-round maintenance schedule. However, winter poses unique risks to their reliability.
The Critical Role of Scheduled Maintenance
Unlike portable units, standby generators are complex, integrated machines designed to sense an outage and start automatically. Their winterization is primarily about ensuring all components are in peak condition to handle the stress of continuous cold operation.
This includes:
- Fluid Checks: Ensure the oil is the correct winter viscosity (as per the manufacturer) and that coolant levels are topped off and rated for your expected minimum temperature.
- Hoses and Belts: Inspect all hoses for cracks and belts for tension and wear. Cold weather makes rubber brittle, increasing the risk of a failure during a high-stress startup.
- Self-Test Function: Confirm the generator’s self-test cycle is programmed and running correctly. This is the ultimate test of readiness. If the unit fails a test in cold weather, address the issue immediately.
To understand the complexity and reliability built into these permanent systems, it’s helpful to review features of the best home standby generators, many of which come with cold-weather kits built-in.
External Protection: Enclosure and Pad Integrity
Standby generators are designed with weather-resistant enclosures, but these still require inspection. Check the enclosure for any gaps or cracks that could allow moisture, pests, or excessive wind to enter. Ensure the unit’s mounting pad is stable. Ground freezing and thawing cycles can shift the pad over time, potentially stressing fuel lines and electrical conduit. Address any significant movement before the deep freeze sets in.
Ensuring Optimal Ventilation and Snow Clearance
A major winter threat to a standby unit is snow and ice accumulation. The unit relies on intake and exhaust vents for cooling and for expelling deadly carbon monoxide. If these are blocked by drifting snow, ice, or even overgrown landscaping, the generator can overheat or create a deadly exhaust backup. Never run a generator with snow piled around the enclosure. Regularly clear a wide perimeter around the unit, paying special attention to the exhaust ports. Ensure that any protective cover you use is only for non-running status and allows for immediate, unhindered ventilation when the unit starts its test or during an outage. Safe operation requires continuous airflow, reinforcing the need for proper ventilation for generators in all conditions.
Safety and Operational Considerations in Icy Conditions
Regardless of the generator type, the operation and maintenance of a generator during cold weather introduces heightened safety risks that must be managed.
Fire and Carbon Monoxide Safety Review
Cold weather often compels people to take unsafe shortcuts, primarily by moving portable units too close to the house for convenience. Carbon monoxide poisoning is a risk that increases in calm, cold air when the exhaust is less likely to disperse effectively. Review the 20-foot minimum distance rule and ensure your CO detectors inside the home are fully functional. Furthermore, cold temperatures require more energy to start, meaning the unit may run hotter initially, increasing fire risk if placed near flammable winter debris like dry leaves or storage materials.
![]()
Safe Refueling Practices in Winter
Refueling a portable generator in cold or icy conditions is inherently more dangerous due to reduced dexterity and slippery surfaces. The following practices are paramount during winter:
- Allow Cooling Time: Never refuel a hot engine. Cold hands may rush the process, increasing the chance of spillage. Always wait 10–15 minutes after shutdown for the engine surfaces to cool.
- Use the Right Container: Only use approved, non-spill fuel containers.
- Maintain Sure Footing: Clear snow and ice from the refueling area before starting the process to prevent slips that could lead to injury or fuel spills onto the hot engine.
Always refresh your knowledge on the proper procedure to ensure safety while refueling. Learn how to refuel your generator safely, especially when dealing with the constraints of winter conditions.
Managing Extension Cords in Snow and Ice
If you rely on heavy-duty extension cords with a portable unit, winter poses risks to the cord itself. Snow, ice, and freezing water can damage insulation, and a frozen cord is easier to trip over or yank, potentially damaging the generator’s outlets or the appliance. Ensure all cords are specifically rated for outdoor, cold-weather use and inspect them for cracks or fraying before each use. Always route the cords away from foot traffic and any areas where ice is likely to form.
Additional Deep Winter Protection and Proactive Steps
Achieving a high level of winterization goes beyond the basics. These proactive steps can significantly boost reliability and lifespan in harsh environments.
Moisture Control and Rodent Prevention
Moisture is a silent killer of electrical components. While standby units are sealed, portable units in storage are vulnerable. Consider placing moisture absorbers (like desiccant packets) in the storage area, particularly around the air filter and electrical panel. Furthermore, cold weather drives rodents into warm, sheltered spaces like generator enclosures. They can chew through wiring, causing catastrophic failure. Use non-toxic deterrents (peppermint oil, dryer sheets) or traps around the storage area to prevent damage.
The Importance of Periodic Winter Testing
Even if you’ve followed every step to winterize your generator for storage, it’s advisable to run the unit for 20 minutes every month during the winter. This practice circulates the oil and fuel (if stabilized), lubricates seals, and charges the battery. For units ready for use, this test run ensures the engine starts reliably in the current cold conditions, providing confidence that it will perform during a real emergency.
Professional Tune-Ups Before the Season
For those who are not mechanically inclined, hiring a certified technician for a pre-winter tune-up is a wise investment. They can perform checks that the average user might overlook, such as:
- Testing battery load capacity in cold conditions.
- Adjusting carburetor settings (if applicable) for optimal cold-weather performance.
- Flushing and replacing coolant.
- Thoroughly inspecting the Automatic Transfer Switch (ATS) to ensure seamless transition in freezing weather.
Documentation and Readiness Checklist
A final step in successful winterization is creating a simple checklist. Post it near the generator’s storage location. This list should detail the fuel type, the cold-weather oil used, the location of the spare spark plug, and a reminder of the 20-foot CO safety rule. Having this information readily available under stress can prevent dangerous mistakes.
Final Thoughts
The severity of winter weather underscores the importance of a reliable backup power system. Whether you are safeguarding a portable generator against the damages of prolonged storage or ensuring your whole-house standby generator can handle an extended cold-weather outage, the principle remains the same: meticulous preparation yields guaranteed performance. By following the comprehensive steps outlined here—from carefully managing fuel and switching to low-viscosity oils, to maintaining critical clearances around standby enclosures—you not only protect your investment but, more importantly, secure the safety and comfort of your home or business. Don’t wait for the first snowflake to fall; be proactive, execute your winterizing regimen now, and ensure your generator is ready to be your most dependable tool when the cold strikes.
Amranul is a highly experienced product review writer with a passion for helping readers make smart, informed purchasing decisions. Since 2018, he has specialized in thoroughly researching and analyzing a wide range of products to deliver honest, in-depth reviews. Amranul combines technical accuracy with clear, engaging writing to break down complex product features and highlight true user value. Look for his reviews to find reliable information and expert insights you can trust before you buy!


