Preparing for a power outage is a homeowner’s responsibility, and a standby or portable generator is an excellent solution for keeping essential appliances running. However, safely and effectively connecting that generator to your home’s electrical system requires one critical component: a transfer switch. This isn’t just a convenience; it’s a non-negotiable safety and legal requirement that protects your household, your appliances, and utility workers. This comprehensive guide will walk you through everything you need to know about choosing, sizing, and installing a transfer switch for your generator.
Why a Transfer Switch is Non-Negotiable: Safety and Code Compliance
Before diving into the “how-to,” it’s crucial to understand the “why.” You should never attempt to connect a generator directly to a standard wall outlet or use a hazardous “backfeeding” method by plugging it into your main circuit breaker panel. This practice, besides being illegal, is incredibly dangerous. The danger lies in a phenomenon called backfeeding, which is the reverse flow of electrical current.
The Dangers of Backfeeding
When you backfeed electricity, you send power from your generator out onto the utility company’s lines. Imagine a utility worker trying to repair a downed line, believing it to be de-energized. If your generator is backfeeding, that line can be energized with deadly voltage, resulting in severe injury or even death. This is why a transfer switch is mandatory.
A transfer switch ensures that your home is physically and electrically isolated from the utility grid before the generator power is introduced. It provides a reliable, safe, and code-compliant method for switching your home’s power source between the utility company and your generator. This isolation is achieved by the switch’s design, which has a mechanism that makes it impossible for both power sources to be connected simultaneously—a concept known as a make-before-break or break-before-make system, depending on the switch type.
Understanding the Two Main Types of Transfer Switches
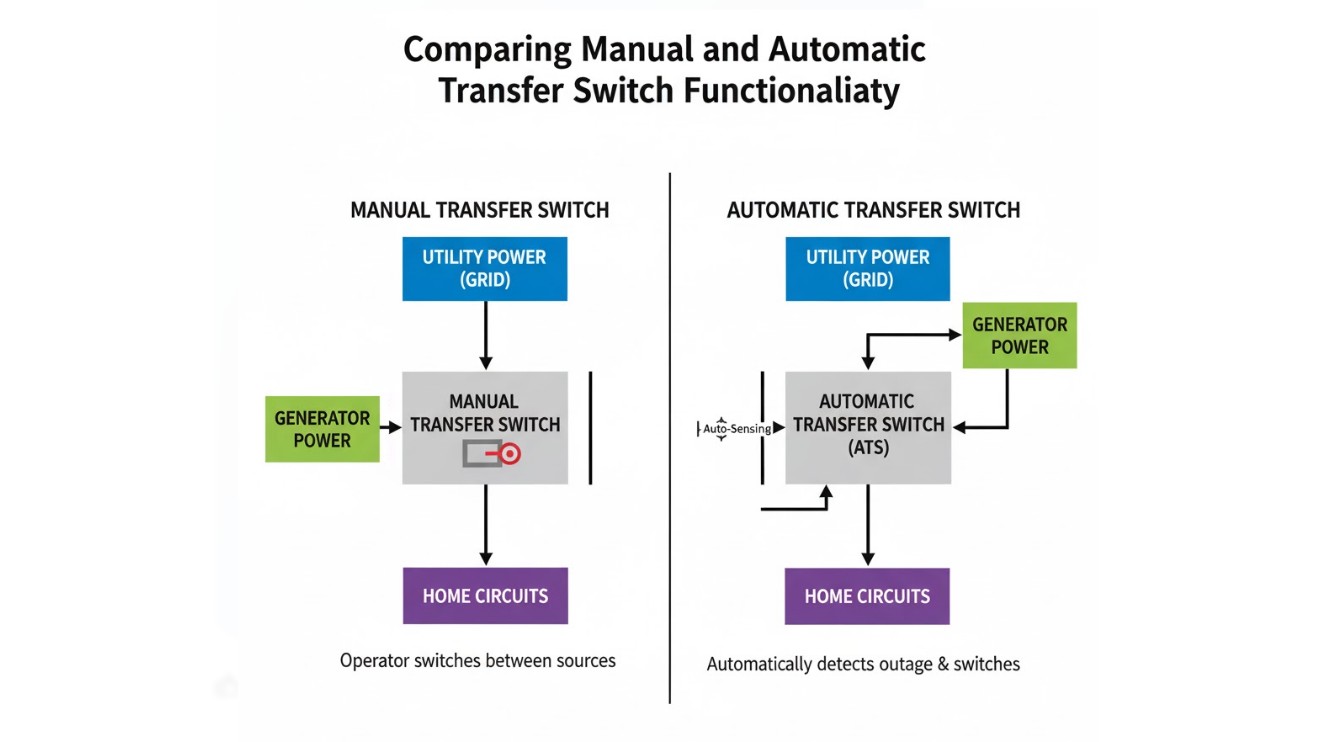
When looking into installing a transfer switch for your generator, you’ll generally encounter two main types: Manual Transfer Switches (MTS) and Automatic Transfer Switches (ATS). The choice between them depends on your budget, generator type, and desired level of convenience.
1. Manual Transfer Switches (MTS)
A Manual Transfer Switch requires human intervention to operate. When the power goes out, you must manually start your portable generator, then go to the MTS and physically flip a switch to move your home from utility power to generator power. Conversely, when utility power returns, you flip the switch back and then shut down your generator.
Pros and Cons of MTS
- Pros: Generally more affordable and simpler to install. Ideal for use with portable generators. Gives you complete control over when the generator runs.
- Cons: Requires manual action in all weather conditions. Slower transition to backup power.
For a deeper look at how the power flows, you may be interested in How Does a Generator Transfer Switch Work?
2. Automatic Transfer Switches (ATS)
An Automatic Transfer Switch is the preferred choice for a standby generator system. The ATS constantly monitors the utility power. When an outage occurs, it automatically detects the loss, sends a signal to start the standby generator, and once the generator is up to speed, it switches the home’s power source from the utility to the generator—all without you lifting a finger. When utility power is restored, the process reverses: the switch returns the home to utility power, and the generator enters a cool-down cycle before shutting off.
Pros and Cons of ATS
- Pros: Completely automatic, providing seamless and immediate backup power. Essential for sensitive systems, businesses, or when occupants may be unable to start a generator manually.
- Cons: Significantly more expensive. Requires a permanent, usually larger, standby generator. More complex installation.

Sizing and Selecting the Right Transfer Switch Kit
Choosing the correct transfer switch involves more than just picking a type; you need to correctly size it for your home’s needs and the generator’s capacity. An improperly sized switch can lead to trips, damage to appliances, or a lack of power where you need it most.
Sizing Based on Amperage and Generator Output
The transfer switch must be rated to handle the full current load of the circuits it controls. Switch ratings are typically 30 Amp, 50 Amp, 100 Amp, or 200 Amp.
Whole-House vs. Partial-House Switches
The two main sizing strategies are as follows:
- Whole-House Transfer Switch: This is a 100-Amp or 200-Amp switch that replaces your home’s main breaker panel or is installed immediately next to it. It transfers all circuits in your home simultaneously. This option is typically only suitable if your generator’s wattage output is large enough to handle the entire load of your home. It’s often the choice for a permanent standby generator.
- Partial-House (or Sub-Panel) Transfer Switch: This is the most common choice for portable generators and often comes in 6-circuit, 8-circuit, 10-circuit, or larger configurations (e.g., 30-Amp or 50-Amp). This switch only powers a selected number of essential circuits.
To determine the necessary circuits for a partial-house switch, perform a quick power audit. Decide what’s essential—usually the furnace fan, well pump, refrigerator, a few lights, and an outlet or two. Sum the required wattage and ensure your generator can comfortably handle the continuous running load, with extra capacity for starting (surge) loads.
If you’re ready to shop, check out the Best Generator Transfer Switch Kits for recommended models.
The Installation Process: Installing a Transfer Switch for Your Generator
Disclaimer: While the steps are outlined below, the installation of a transfer switch involves working directly with high-voltage electricity and should, in almost all cases, be performed by a licensed electrician. Not only does this ensure safety, but it also guarantees the installation meets all local and national electrical codes (like the National Electrical Code, or NEC).
Step 1: Planning and Permitting
Before any wiring begins, contact your local building department. You will almost certainly need a permit to install a transfer switch, especially if a permanent generator is involved. The work will be subject to an electrical inspection to ensure compliance with safety standards.
Step 2: Locating the Transfer Switch
The switch is typically mounted near the existing main electrical panel. The location must be accessible and allow for the conduit runs from the generator’s external inlet box and the wiring connection to the main panel.
Understanding the component you are connecting to is key. Read up on Understanding Your Home’s Main Circuit Breaker.
Step 3: Installing the Generator Inlet Box
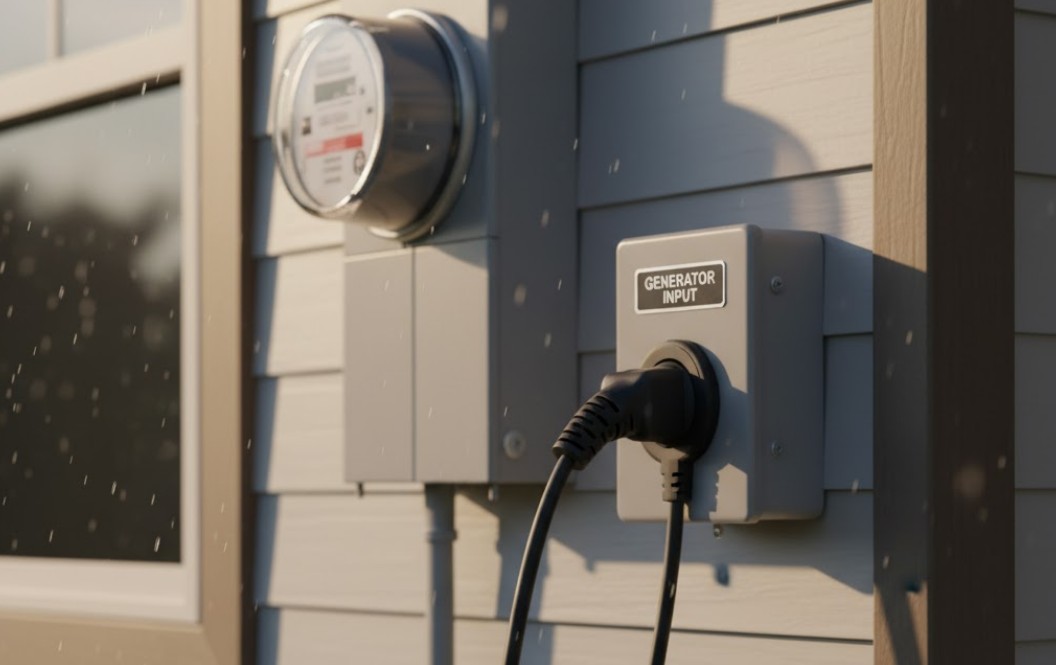
The generator inlet box is a weather-proof box installed on the exterior of your home. This is where you connect the heavy-duty power cord (or twist-lock cord) from your portable generator. The inlet box must be wired to the transfer switch using the appropriate gauge of wire and protected by a conduit.
- Key Requirement: The inlet box should be rated for the maximum output of your generator (e.g., a 30-Amp box for a 30-Amp generator).
- Placement: It must be far enough away from any windows or doors to allow the generator to operate at a safe distance (usually 15-20 feet) to prevent dangerous carbon monoxide from entering the house.
Step 4: Wiring the Transfer Switch to the Main Panel
This is the most critical and hazardous part of the installation. The entire main power must be shut off—often at the meter by the utility company or by pulling the main disconnect fuse—before an electrician proceeds. This involves:
- Running wires from the transfer switch into the main panel.
- In the case of a partial-house switch, removing the circuit breakers for the selected essential circuits and connecting their load wires to the corresponding terminals on the transfer switch.
- Installing a new main breaker in the switch panel that acts as the generator’s dedicated circuit (the generator’s power source).
- Connecting the utility power feed to the switch’s “Utility” terminals and the generator inlet power feed to the switch’s “Generator” terminals.

Post-Installation and Testing
Once the physical installation and wiring are complete, a few final steps are necessary to ensure safe operation.
Inspection and Certification
As mentioned, the local electrical inspector will need to inspect the installation. They will check the wire gauge, grounding, connection points, and, most importantly, confirm that the switch physically prevents backfeeding. This inspection certifies the safety and code compliance of your new setup.
Testing the Transfer Switch System
Testing is paramount. It’s best to perform a full system test before an actual emergency.
- Start your portable generator outdoors at a safe distance and allow it to warm up.
- Plug the generator’s power cord into the exterior inlet box.
- Turn OFF the main breaker in your home’s main panel (simulating an outage).
- Go to the transfer switch and flip the switch from the “Line” or “Utility” position to the “Generator” position.
- Verify that the essential circuits (lights, fridge, etc.) are now receiving power from the generator.
- Once testing is complete, switch the transfer switch back to the “Line” position, turn the main breaker back on, and then shut down your generator.
This test familiarizes you with the process and confirms that all connections were made correctly and safely.
Final Thoughts
The peace of mind that comes with a reliable backup power source is invaluable. However, that peace of mind hinges entirely on the safe and proper installation of a transfer switch. It’s the device that legally and safely bridges the gap between your generator and your home’s electrical system, preventing a catastrophic electrical accident.
While the initial cost and the need for professional installation may seem like hurdles, they are small prices to pay for the safety of utility workers and the protection of your most valuable asset—your home and family. By selecting the right size and type of switch—whether a manual one for your portable generator or an automatic system for a permanent standby unit—you are making a responsible investment in power independence.
Remember, the goal is uninterrupted power, but the primary focus must always be safety and code compliance. Choose quality components, hire a certified electrician, and ensure your system is inspected and approved. This way, when the lights go out, your backup power system is ready, reliable, and, most importantly, safe.
Amranul is a highly experienced product review writer with a passion for helping readers make smart, informed purchasing decisions. Since 2018, he has specialized in thoroughly researching and analyzing a wide range of products to deliver honest, in-depth reviews. Amranul combines technical accuracy with clear, engaging writing to break down complex product features and highlight true user value. Look for his reviews to find reliable information and expert insights you can trust before you buy!


