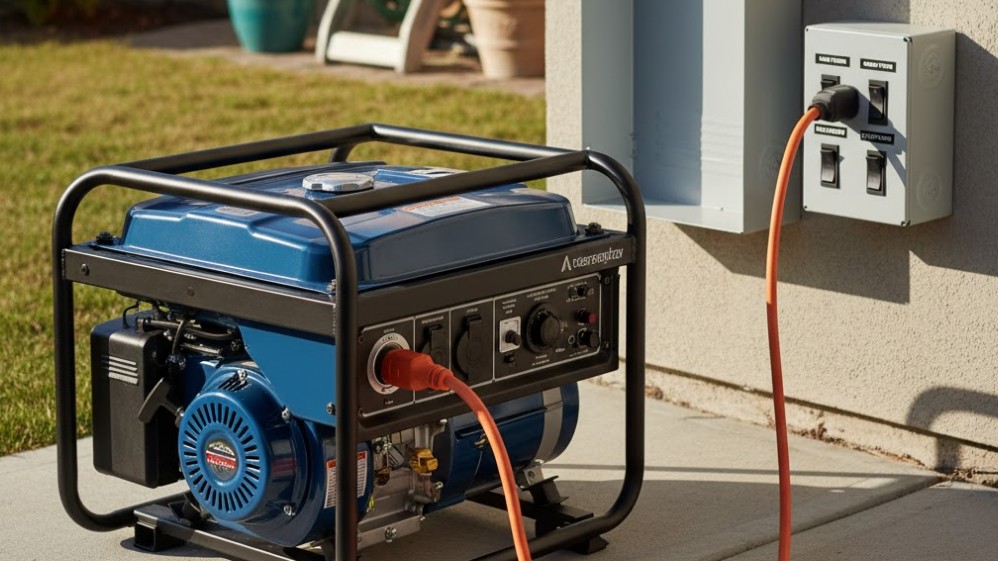
A generator is the cornerstone of preparedness, providing essential power during emergencies, or reliable energy at remote sites. Yet, even the most robust generator is useless if its small, vital components fail. Among the most critical and frequently overlooked parts is the spark plug. This tiny component is responsible for igniting the air-fuel mixture that powers the engine, and its performance directly dictates the generator’s efficiency, fuel consumption, and overall reliability.
Understanding replacing spark plugs in generators is not just for mechanics; it’s a fundamental piece of knowledge for any generator owner. A fouled, worn, or incorrectly gapped spark plug can cause hard starting, engine misfires, poor power output, and excessive fuel consumption. Consequently, proactive maintenance, rather than reactive repair, is the key to ensuring your generator fires up flawlessly when you need it most. This comprehensive, step-by-step guide will demystify the process, empowering you to perform this simple but vital maintenance task safely and effectively, ultimately extending the life of your valuable equipment.
Phase 1: Why, When, and How Spark Plugs Fail
To appreciate the maintenance process, it helps to understand the lifespan and failure modes of the spark plug. Spark plugs operate in an extremely hostile environment—a combustion chamber under intense heat and pressure—which dictates their limited service life.
The Function and Lifespan of a Spark Plug
In simple terms, the spark plug transforms the high voltage supplied by the ignition coil into an electrical spark at its tip. This spark ignites the compressed fuel-air mix. Over time, two things inevitably happen: the metal electrodes (the tip that creates the spark) erode due to the electrical and thermal stress, and the ceramic insulator and electrodes accumulate deposits from the combustion process. Manufacturers typically recommend checking or replacing the spark plug every 100 to 300 operating hours, depending on the engine type and quality of fuel used. Ignoring this schedule is a guarantee of poor performance.
Signs You Need to Replace Your Spark Plug
There are several unmistakable indicators that your spark plug is failing and needs immediate attention. These signs often appear gradually, but should never be ignored:
1. Hard Starting or No Start
If your generator requires many pulls of the cord, or extended cranking of the electric starter, the spark is likely weak. A weak spark can’t consistently ignite the air-fuel mixture, especially when the engine is cold or has been sitting for a while.
2. Engine Misfires or Rough Idling
A failing plug will cause the engine to sound rough, often characterized by a sporadic sputter or a slight popping sound. This happens because the fuel is not igniting in one or more combustion cycles, leading to wasted fuel and irregular power delivery.
3. Reduced Fuel Efficiency
An incomplete burn, caused by a weak or mis-timed spark, means less energy is extracted from the fuel. You’ll notice your generator running fewer hours on the same tank, a clear sign of poor combustion efficiency.
4. Visible Fouling (Upon Inspection)
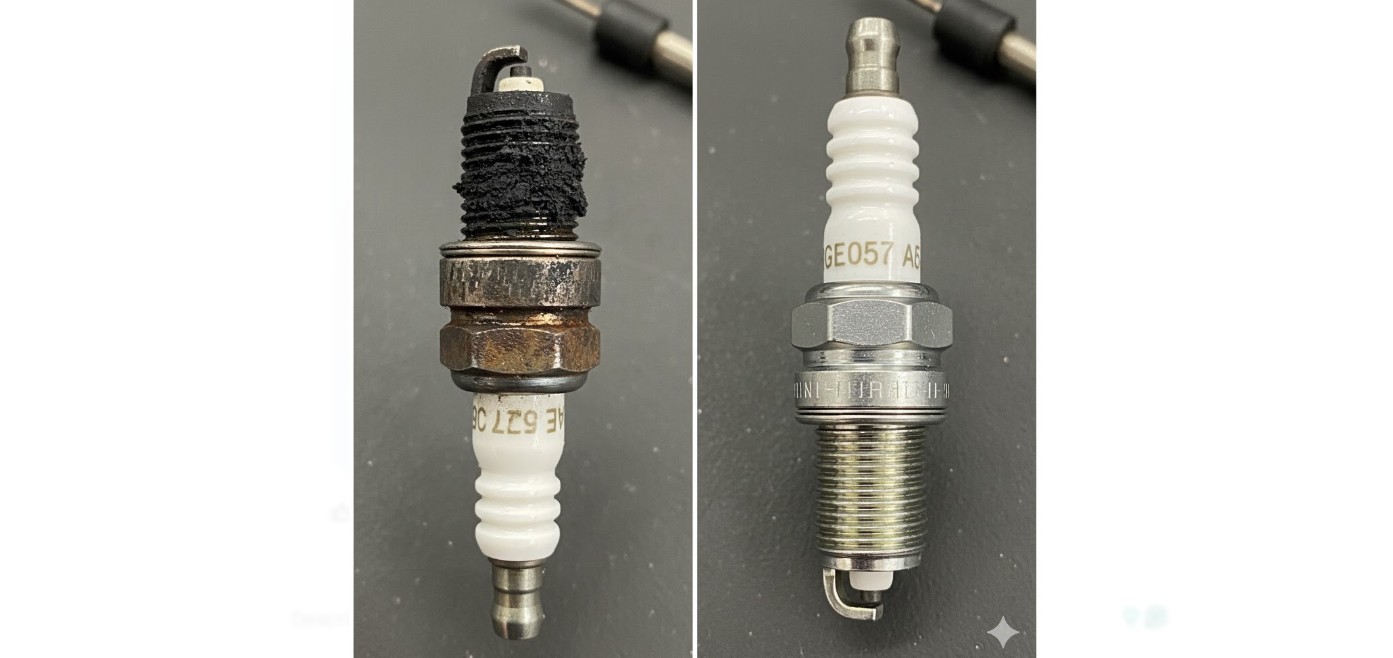
When you remove the old plug, examine the tip. Signs of failure include wet fouling (black, oily residue, often indicating an oil leak or rich fuel mixture), carbon fouling (dry, sooty black deposits, common from extended low-load running), or overheating (blistered, white insulator tip, often indicating an incorrect heat range plug). In fact, the appearance of the old plug is a crucial diagnostic tool for the entire engine.
Phase 2: Preparation and Essential Safety Steps
Before you begin the physical work of replacing spark plugs in generators, preparation is paramount. Safety must always come first, as you will be dealing with a powerful internal combustion engine and high-voltage ignition components.
1. Secure the Area and Ensure Cooling
First and foremost, turn the generator off and allow it to cool completely. Never attempt to service a hot engine. Aluminum engine components and the muffler can retain heat for a long time, posing a severe burn risk. Next, ensure the generator is on a stable, level surface with plenty of workspace around it.
2. Disconnect the Ignition System
This is the most critical safety step. Before touching the spark plug, you must disconnect the source of high voltage. Trace the thick wire (the ignition coil wire or boot) back to the spark plug and pull the boot off. Place this boot where it cannot accidentally contact the spark plug terminal or any part of the metal engine block. This prevents any chance of the engine starting or delivering a shock while you work.
3. Gather the Right Tools and Parts
You’ll need specific tools to do the job correctly and avoid damaging the engine’s soft aluminum cylinder head. The essential items are:
- New Spark Plug: Must match the OEM (Original Equipment Manufacturer) specification for your generator’s make and model. Check your owner’s manual for the exact part number (e.g., NGK BPR6ES, Champion RJ19LM).
- Spark Plug Wrench: A specialized tool, usually a socket wrench with a rubber insert to grip the plug. Depending on the plug size, this is typically a 13/16″ or 5/8″ socket. For more general tool knowledge, you can consult resources like all about wrenches.
- Feeler Gauge: Used to set the precise gap between the plug electrodes.
- Wire Brush and Clean Cloth: For cleaning the spark plug area and wiping surfaces.
- Anti-Seize Lubricant: Recommended for the new plug threads to prevent seizing in the aluminum head.
Phase 3: The Step-by-Step Replacement Process
The actual process of replacing spark plugs in generators is straightforward, provided you are meticulous and follow the correct sequence.
Step 1: Locate and Clean the Plug Area
The spark plug is typically located on the side or front of the engine block. Once the boot is removed, use a clean cloth or a small wire brush to thoroughly clean the area around the plug base. Debris, dirt, or dust falling into the combustion chamber when the old plug is removed can cause significant engine damage. Blow away any loose material with compressed air or simply wipe it away.
Step 2: Remove the Old Spark Plug
Carefully fit the spark plug wrench (or deep-well socket) over the plug. Turn the wrench counter-clockwise to loosen the plug. Be cautious: if the plug is extremely tight, apply penetrating oil and let it sit before trying again. Never use excessive force, as stripping the threads of the aluminum cylinder head is an expensive repair. Once loose, unscrew the plug by hand. Examine the old plug immediately to diagnose any underlying engine issues (as noted in Phase 1).
Step 3: Gap the New Spark Plug
While most new spark plugs come pre-gapped, it is absolutely vital to verify the setting. Consult your generator manual for the precise spark plug gap specification (e.g., 0.030 inches). Use the feeler gauge to measure the distance between the center and ground electrodes. If adjustment is needed, use the bending tool on the feeler gauge to gently adjust the gap until the gauge slides through with a slight drag. An incorrect gap will result in a weak or unreliable spark.

Step 4: Install the New Spark Plug
Apply a thin layer of anti-seize compound to the threads of the new plug. This prevents the plug from bonding with the aluminum head due to heat cycles. Now, thread the new plug into the cylinder head by hand. This is crucial. Hand-threading ensures you don’t cross-thread the delicate aluminum. If you feel any resistance, stop, remove the plug, and restart. Once finger-tight, use the wrench to finish the tightening.
Tightening Torque Considerations
Do not overtighten! Overtightening can stretch the plug or damage the head threads. If you have a torque wrench, tighten to the manufacturer’s specified torque (usually around 15–20 lb-ft). If using a standard wrench, plugs with gaskets (common in generators) should be tightened about a half-turn (180 degrees) past finger-tight; those without gaskets should be tightened about 1/16th of a turn (30 degrees).
Step 5: Reconnect and Test
Re-attach the spark plug boot firmly onto the terminal of the new plug. You should feel a distinct “click.” Double-check that all tools are clear of the engine area. Start the generator. A properly installed new plug should result in instant starting and a noticeably smoother, more consistent idle. Allow the generator to run for a few minutes to ensure stable operation under load.
Phase 4: Advanced Generator Cord and Power Considerations
While spark plugs deal with internal engine health, your generator’s overall performance and safety are also intrinsically linked to how you manage its power output. The spark plug ensures efficient power creation, and the extension cord ensures safe power delivery.
Optimizing Power Output and Cord Management
An efficiently running generator—one with a clean, properly gapped spark plug—will deliver its maximum rated wattage reliably. This makes it easier to follow the crucial 80% rule (limiting continuous load to 80% of capacity). Furthermore, the quality of your power delivery system is just as vital as engine maintenance. Using improper extension cords can lead to electrical resistance and voltage drop, which forces the perfectly tuned generator to work harder, negating the benefits of a new spark plug. Therefore, always invest in heavy-gauge, outdoor-rated generator extension cords, a topic covered in detail by guides on the best generator extension cords.
Beyond Gasoline: Alternative Power Sources
The move toward cleaner power sources, such as portable power stations and solar generators, changes maintenance but not the underlying principles of power transfer. While these units eliminate the need for oil and spark plugs, they introduce new components that need attention, particularly the cables. For instance, the specialized cables used to connect solar panels to power stations must also be correctly sized to minimize resistance and heat, ensuring maximum charging efficiency. Resources covering the best solar panel extension cables are essential reading for owners of these alternative systems, underscoring that electrical efficiency is a constant in all power generation.

Phase 5: Troubleshooting and Long-Term Generator Health
Even after successfully replacing spark plugs in generators, problems can occasionally persist. This final phase covers what to check next and how to integrate this maintenance into a broader schedule.
Persistent Issues After Replacement
If the engine still runs rough, misfires, or won’t start after installing a new spark plug, the issue likely lies elsewhere. Check the following in sequence:
1. Fuel System
Clogged carburetors or stale fuel are the most frequent causes of generator issues. If the generator has been stored with gasoline in the tank for more than a few months, the fuel can separate and gum up the carburetor jets. Drain the old fuel and use fresh, stabilized fuel.
2. Air Filter
A dirty air filter restricts airflow, leading to a “rich” fuel mixture (too much fuel, not enough air), which fouls the new spark plug almost immediately. Clean or replace the air filter regularly, especially after dusty use.
3. Oil Level
Excessively high oil levels can lead to oil being burned in the combustion chamber, resulting in rapid wet fouling of the spark plug. Always check the oil level according to the dipstick instructions and avoid overfilling.
4. Ignition Coil
If the coil fails, it will not deliver the necessary high voltage to the plug, regardless of how new the plug is. This requires testing the coil output with a specialized tool, often a job best left to a small engine technician.
The Broader Generator Maintenance Schedule
Spark plug replacement should be part of a cyclical maintenance routine that includes other critical checks. A comprehensive maintenance schedule should look something like this:
- Every 50 Hours: Check oil level; visually inspect air and fuel filters.
- Every 100 Hours or Annually: Change the oil; clean/replace the air filter; inspect the spark plug and adjust the gap.
- Every 200–300 Hours or Annually: Replace the spark plug; replace the oil filter (if applicable); inspect the fuel line; test the electrical outlets.
- Every 2 Years: Flush and replace fuel in the tank (if stored for extended periods); check the battery (for electric start models).
Adhering to this routine ensures that the benefits of a new spark plug are supported by a healthy, well-functioning engine ecosystem.
Fuel Quality and Spark Plug Health
The type and quality of fuel dramatically affect how quickly a spark plug degrades. Ethanol-blended fuel (E10) can pull moisture from the air, causing corrosion on internal components, which indirectly leads to combustion issues and spark plug fouling. Wherever possible, use ethanol-free, high-quality gasoline, especially when storing the generator for long periods. If using standard gasoline, always treat it with a quality fuel stabilizer before storage or extended periods of non-use. A clean fuel system supports a clean combustion process, which is the best friend of a spark plug.

Final Thoughts
A generator is only as reliable as its weakest link. For internal combustion models, that link is often the tiny, yet powerful, spark plug. Taking a few moments to understand replacing spark plugs in generators, gathering the correct tools, and following the proper steps will reward you with instant starts and maximum power output for years to come. Remember the watchwords of generator maintenance: Cool, Clean, and Correctly Gapped.
Do not wait for an outage to discover your engine sputtering. Make spark plug maintenance a core part of your preparedness routine. A well-maintained generator ensures that when the lights go out, your power stays on.
Amranul is a highly experienced product review writer with a passion for helping readers make smart, informed purchasing decisions. Since 2018, he has specialized in thoroughly researching and analyzing a wide range of products to deliver honest, in-depth reviews. Amranul combines technical accuracy with clear, engaging writing to break down complex product features and highlight true user value. Look for his reviews to find reliable information and expert insights you can trust before you buy!


