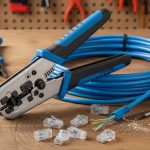
In an age where power outages are becoming increasingly common and the need for sustainable energy is critical, having a reliable backup power source is no longer a luxury—it’s a necessity. While many pre-built commercial units exist, learning how to build a solar generator yourself offers tremendous benefits: customization, cost savings, and a deeper understanding of your power ecosystem. This comprehensive, step-by-step guide will walk you through every phase, ensuring you create a safe, efficient, and robust power solution tailored perfectly to your needs.
The journey from concept to a fully operational DIY solar generator might seem daunting, but it is achievable with careful planning and attention to detail. This is more than just a weekend project; it’s an investment in energy independence and a step toward embracing green energy.
Phase 1: Planning and Sizing Your Solar Generator System
Before buying a single component, you must clearly define what your solar generator needs to power. This initial planning phase is the most critical step and directly impacts the cost and performance of your final unit. A common mistake is undersizing the battery or inverter, leading to frustration during a power crisis.
A. Determining Your Power Needs (The Power Audit)
To calculate the required size, you need to conduct a simple power audit. List every device you plan to run—lights, laptops, fans, a small refrigerator, or even a CPAP machine—and for how long.
1. Calculate Wattage
Look at the labels on your devices to find their running wattage. If only amps are listed, multiply amps by the voltage (usually 120V) to get the wattage ($\text{Watts} = \text{Amps} \times \text{Volts}$).
2. Calculate Watt-Hours (Energy Consumption)
The energy consumption (Watt-Hours or Wh) is calculated by multiplying the running wattage by the number of hours you need the device to run. For instance, a 50W light running for 4 hours consumes $50 \text{W} \times 4 \text{h} = 200 \text{Wh}$. Summing all these up gives you your total daily energy requirement.
Transition: Now that you have a firm grasp of your energy consumption, we can translate that into the core components.
B. Sizing the Core Components
1. The Inverter Size (Peak Power)
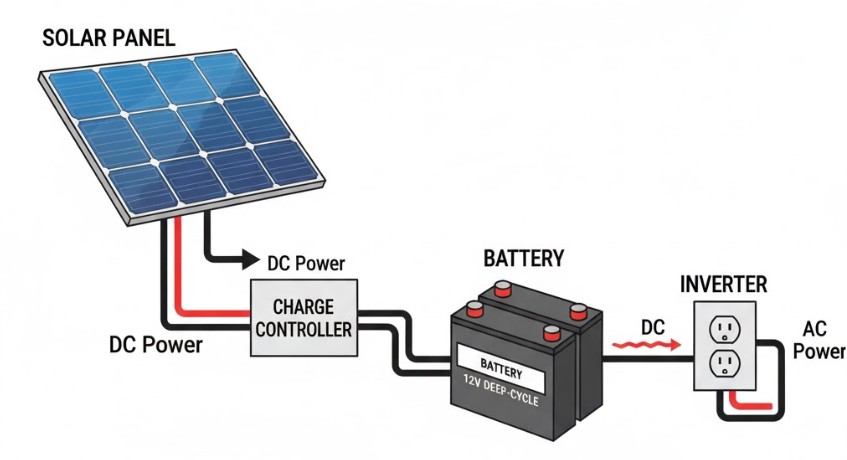
The inverter converts the DC power from your battery into the AC power needed for household appliances. It must be rated high enough to handle the surge (startup) wattage of your most demanding appliance, plus the running wattage of all devices running simultaneously. Look at your highest surge wattage (often from motors or compressors) and choose a pure sine wave inverter with at least a 20% buffer above that value. A good starting point for a backup unit is a 1000W to 2000W inverter. For those interested in portable options for travel, you might look at our guide on best solar generators for RV camping.
2. The Battery Bank Size (Storage Capacity)
The battery is the heart of your solar generator build. Its capacity is measured in Amp-Hours (Ah) or Watt-Hours (Wh). If you calculated a daily need of 500Wh, you’d need a battery bank with at least 500Wh of usable capacity. We recommend using LiFePO4 (Lithium Iron Phosphate) batteries due to their long cycle life, safety, and deep discharge capability, which is far superior to traditional lead-acid batteries.
Formula for Battery Capacity (Wh):
$$\text{Required Wh} = \frac{\text{Daily Consumption (Wh)} \times \text{Days of Autonomy}}{\text{Depth of Discharge (DoD)} \times \text{Inverter Efficiency}}$$
For LiFePO4, use a DoD of 0.90 (90%) and an Inverter Efficiency of 0.85 (85%) for a safe, reliable calculation.
3. The Solar Panel Size (Recharge Rate)
The size of your panels determines how quickly you can replenish the energy used. This is based on your local “Peak Sun Hours” (PSH)—the number of hours per day when solar irradiation averages 1000W per square meter. If your battery capacity is 1000Wh, and you get 5 PSH, you would ideally need a $1000 \text{Wh} / 5 \text{h} = 200 \text{W}$ solar panel array to recharge it fully in one day. To speed this up, a common approach is to double the panel wattage, or look for tips on how solar generators work to better optimize efficiency.
Phase 2: Gathering the Essential Components
With your sizes calculated, it’s time to source the parts. Opting for quality components, while slightly more expensive upfront, ensures longevity and safety. This is particularly true for critical components like the charge controller and inverter.
A. The Core Component Checklist
- Battery (Storage): LiFePO4 battery (e.g., a 12V 100Ah battery).
- Inverter (Conversion): Pure Sine Wave Inverter (sized to your peak load).
- Charge Controller (Management): An MPPT (Maximum Power Point Tracking) controller is highly recommended over PWM (Pulse Width Modulation) for its superior efficiency, particularly in cold or cloudy conditions.
- Solar Panels (Input): Flexible or rigid monocrystalline panels (total wattage determined in Phase 1).
B. The Supporting Components and Safety Gear
The electrical components need proper support, protection, and integration. Do not skimp on safety!
- The Enclosure: A robust, non-conductive box (like a waterproof plastic tool case) to house the battery, inverter, and controller.
- Fuses and Breakers: Crucial for safety. You need an appropriately sized fuse between the solar panel and the charge controller, and a large DC breaker between the battery and the inverter. These prevent catastrophic failure from short circuits.
- Wiring and Connectors: Use appropriately gauged copper wire (AWG) rated for the maximum current of your system. Heavier gauge wire is needed for the high-current connection between the battery and the inverter. You may also need extension cables; read more about best solar panel extension cables for tips.
- Monitoring Tools: A simple battery monitor (or shunt) is invaluable for keeping track of the battery’s State of Charge (SoC).
- Ventilation: Even sealed batteries like LiFePO4 need some airflow, and the inverter generates heat. Ensure your enclosure has passive or active ventilation.
Phase 3: The Step-by-Step Assembly and Wiring Process
This is where the planning becomes a physical reality. Follow the wiring sequence strictly. An incorrect wiring order, particularly connecting the solar panel before the battery, can damage your charge controller.
A. Preparing the Enclosure
Start by physically mounting the components inside your case. Ensure the heaviest component, the battery, is secured at the bottom. Mount the charge controller and the inverter nearby. Drill holes for ventilation, power ports (USB, 12V), and the AC outlets from the inverter, ensuring a professional and neat layout.
B. The Critical Wiring Sequence (Battery First!)
1. Connecting the Charge Controller to the Battery
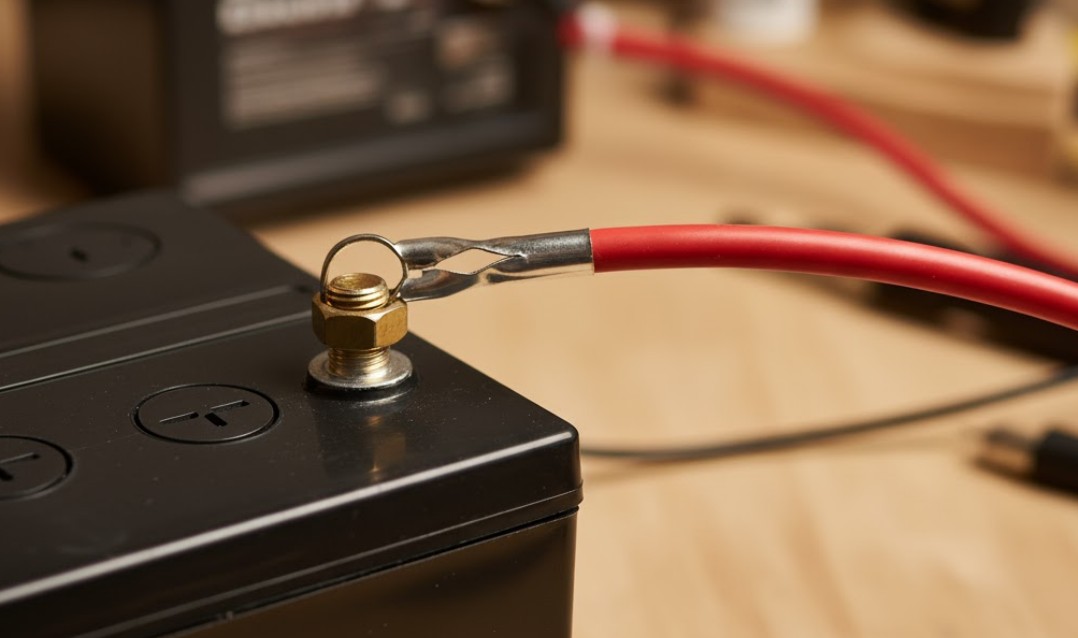
This is the most crucial step. Connect the negative and positive wires from the **BATTERY** terminals on the charge controller to the corresponding negative and positive terminals on your battery. This step allows the controller to recognize the system voltage (12V or 24V).
2. Connecting the Battery to the Inverter
Connect the heavy-gauge wires from the battery terminals to the input terminals of the inverter. Crucially, insert the high-current DC breaker/fuse on the positive line between the battery and the inverter. This is your primary safety cut-off. Ensure all connections are tight and secure—loose connections cause heat and are a fire hazard.
3. Connecting the Solar Panel to the Charge Controller
Now, and only now, connect the wires from your solar panel array to the **PV (Photovoltaic)** input terminals on the charge controller. The controller will now begin regulating the power flow to the battery. Use a multimeter to verify the correct voltage from the panels before connecting them.
Transition: With the core system wired, let’s talk about optimization and applications.
Phase 4: Testing, Optimization, and Real-World Applications
Once built, a DIY solar power generator requires initial testing and calibration to ensure peak performance. After all, the goal is reliable, uninterrupted power.
A. Initial Commissioning and Safety Check
With everything connected:
- The Load Test: Turn on the inverter and plug in a medium-sized appliance (like a blender or a small space heater) that uses about 50% of your inverter’s rating. Monitor the battery voltage and temperature. The system should run smoothly without any excessive heat or alarming noises.
- The Charging Test: Place the solar panels in direct sunlight and monitor the charge controller. It should display the input voltage from the panels and the current (amps) being delivered to the battery. A quality MPPT controller should show a higher output voltage than the panel’s direct input voltage.
- Grounding: For safety, especially with larger, home-based units, the inverter and enclosure should be properly grounded. Always consult an electrician for permanent home-backup installations.
B. Troubleshooting Common Issues
When you build a solar generator, you might encounter a few hiccups:
- Issue: Low Charging Rate: Check for dirt on the panels, shading, or undersized wires. If the sun is strong and the rate is low, you might need a higher-wattage panel array.
- Issue: Inverter Overload/Shutdown: This usually means your connected load is too high. Check the surge rating of the appliance and either run fewer appliances simultaneously or upgrade your inverter size.
- Issue: Battery Not Holding Charge: If you are using new LiFePO4 cells, ensure they are properly balanced. If using older batteries, they may have reached the end of their cycle life.
C. Where Your Custom Generator Shines
The beauty of a custom build is its versatility. Unlike generic store-bought units, your generator is tailored for specific uses. You might have built a powerful unit for comprehensive home backup or a more portable one suitable for off-grid living. Remember that commercial units are often great options too, and you can compare your build with what’s available by reviewing the best solar powered generators on the market.
Transition: Before we conclude, let’s explore how to maximize your generator’s lifespan and discuss its potential for integration.
Extending the Life and Performance of Your Solar Generator
To ensure your investment lasts for years, regular maintenance is essential. For most DIY setups, this involves checking the connections and monitoring the battery health. Over time, terminals can loosen, and dust can accumulate on fans and vents. A quick, annual inspection can prevent costly failures. Furthermore, understanding the nuances of how the charge controller communicates with the battery is paramount. For instance, cold temperatures can significantly affect battery performance; an MPPT controller will adjust its charging profile to protect the battery, whereas a cheaper controller might not, leading to long-term degradation. Therefore, if you are planning to use your generator in extreme environments, consider adding insulation or a small internal heating pad for the battery box. This meticulous care is what separates a short-term project from a reliable, long-term power solution.
Another area of focus is expandability. One of the greatest advantages of a DIY system is the ease with which you can add capacity. If you find your 100Ah battery is insufficient, you can often simply purchase another identical battery and wire it in parallel (12V) or series (24V/48V) to double the capacity. Similarly, if your charging time is too long, you can easily add more solar panels to your array, provided your charge controller has the capacity to handle the increased current. This modularity means your custom solar generator can grow alongside your power needs, unlike many commercial units that have fixed specifications.
The choice of wiring is also a constant factor in efficiency. Even a small increase in wire resistance due to using a thinner gauge wire can translate to tangible energy losses, particularly between the solar panels and the charge controller over long distances, or between the battery and the inverter where current is highest. Always err on the side of caution and use thicker wire than strictly necessary according to gauge charts. This ensures maximum power transfer and minimizes heat generation—a major cause of component failure. The entire premise of building your own solar generator rests on controlling the quality and reliability of every link in the power chain, giving you the peace of mind that comes with a robust, self-engineered system.
Advanced Considerations: Integrating with Home Systems
For those building a larger-scale unit intended as a serious backup for a home, advanced integration is a key step. The critical component here is a manual transfer switch (MTS) or, for higher budgets, an automatic transfer switch (ATS). NEVER connect your generator directly to your home’s wiring without one. Connecting the generator without a transfer switch (often called “back-feeding”) is incredibly dangerous. It can send electricity back into the grid, potentially electrocuting utility workers trying to restore power, or causing severe damage to your generator and home appliances. An electrician must install a transfer switch; it isolates a few critical circuits (like the refrigerator, a few lights, and the well pump) and allows you to safely switch their power source from the utility grid to your DIY solar generator.
The battery technology is also rapidly evolving, further enhancing DIY capabilities. Beyond the standard 12V LiFePO4 systems, many enthusiasts are now opting for 48V systems. Higher voltage systems are inherently more efficient for large loads because they carry the same amount of power with less current, allowing for thinner, less expensive wiring. This is a crucial detail for anyone designing a system over 3000W. Furthermore, battery management systems (BMS) for these high-voltage packs are becoming smarter, offering Bluetooth monitoring and better cell balancing features, making it easier than ever to maintain a complex battery bank. When considering these advanced systems, the initial investment is higher, but the scalability and efficiency gains for serious home backup make them a worthwhile pursuit. The continuous improvement in solar efficiency also means that a physically smaller panel array today can deliver the same power as a much larger array from a few years ago, simplifying the setup and reducing rooftop real estate needs. This dynamic technological landscape ensures that a DIY solar generator is a future-proof investment in personal energy independence.
The entire endeavor of learning how to build a solar generator is a rewarding process that combines practical skills with a deep dive into renewable energy concepts. The final product is a quiet, emission-free source of power that stands ready for any challenge, whether it’s a camping trip or an extended grid outage. It’s an act of empowerment that gives you control over one of the most fundamental modern needs: electricity. By following the comprehensive steps outlined here, you ensure that your homemade power station is built not just for function, but for longevity and uncompromising safety.
Comparing DIY vs. Commercial Solar Generators
While this guide focuses on how to build a solar generator, it’s helpful to understand the trade-offs:
DIY Advantages (The Build-Your-Own Benefit)
- Customization: You choose the exact battery chemistry, inverter output, and panel input. Need a massive battery but a small inverter? You can do that.
- Cost Efficiency: Per Watt-Hour of storage, a DIY build is often significantly cheaper than a pre-built unit.
- Repairability: If one component fails (e.g., the charge controller), you simply replace that part, not the entire unit.
Commercial Advantages (The Convenience Factor)
- Plug-and-Play: Ready to use out of the box with built-in safety features.
- Portability and Aesthetics: Often more compact, lighter, and housed in sleek, designed enclosures.
- Warranty: Comes with a single manufacturer’s warranty covering the whole unit.
Ultimately, a successful DIY solar generator is a testament to your engineering skills and commitment to sustainability. By carefully following the steps for sizing, component selection, and safe wiring, you create a power source that is not only powerful but deeply satisfying to own.
Final Thoughts on Your DIY Solar Generator Journey
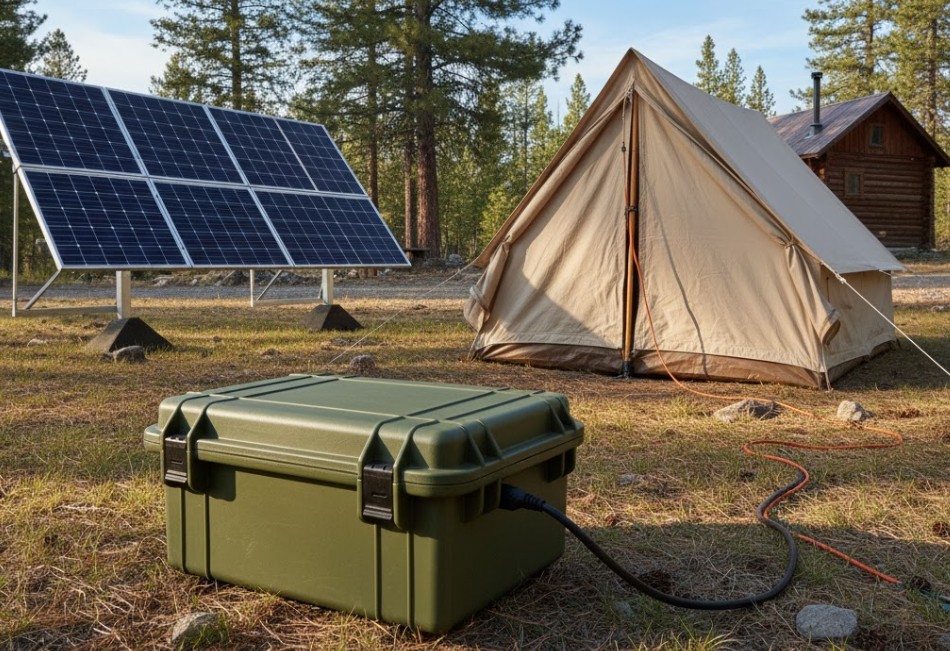
Congratulations! You have taken the complex task of designing, sourcing, and assembling an independent power source and turned it into a tangible, functional reality. Learning how to build a solar generator provides more than just electricity; it provides knowledge and self-sufficiency. This unit is reliable for emergencies, perfect for remote workshops, or an essential part of your off-grid system.
The key takeaway from this extensive guide is the importance of safety and proper sizing. Always fuse and break your circuits correctly, use appropriate wire gauges, and ensure your components are matched to your calculated power needs. Your custom solar generator stands ready, a powerful, quiet, and sustainable safeguard against the unpredictability of the grid. Enjoy the freedom of your new power source!
Amranul is a highly experienced product review writer with a passion for helping readers make smart, informed purchasing decisions. Since 2018, he has specialized in thoroughly researching and analyzing a wide range of products to deliver honest, in-depth reviews. Amranul combines technical accuracy with clear, engaging writing to break down complex product features and highlight true user value. Look for his reviews to find reliable information and expert insights you can trust before you buy!


